Customize your user environment#
While all hubs come with a default environment, it is possible to create a custom user environment for the hub. Here are a few ways that you can do this.
Create your own image#
Our hubs use software containers to enable a reproducible software environment for all users on the hub. You can build and bring your own image to the hub, which allows you full control over your software environment.
There are two ways that you can do this:
Update a community-maintained upstream image – add required software packages to an existing community-maintained upstream image. This is the recommended approach for most use cases since this reduces the maintenance burden of keeping the image up to date.
Build your own custom image from scratch – build a new image from scratch that contains all the required software packages. This is an advanced approach if you want full control beyond what is available through community-maintained images.
Link a custom image to your hub#
Follow these steps any time you need to update the environment image that is used on your community’s hub.
Find the image name and the tag for the latest version. For example, for a
quay.ioimage it looks like this:<registry>/<username>/<repo_name>:<git-commit-hash>
e.g.:
quay.io/jnywong/jupyter-scipy-xarray:739fec9705b1
Open a 2i2c support ticket to request an update to your hub with the new custom image.
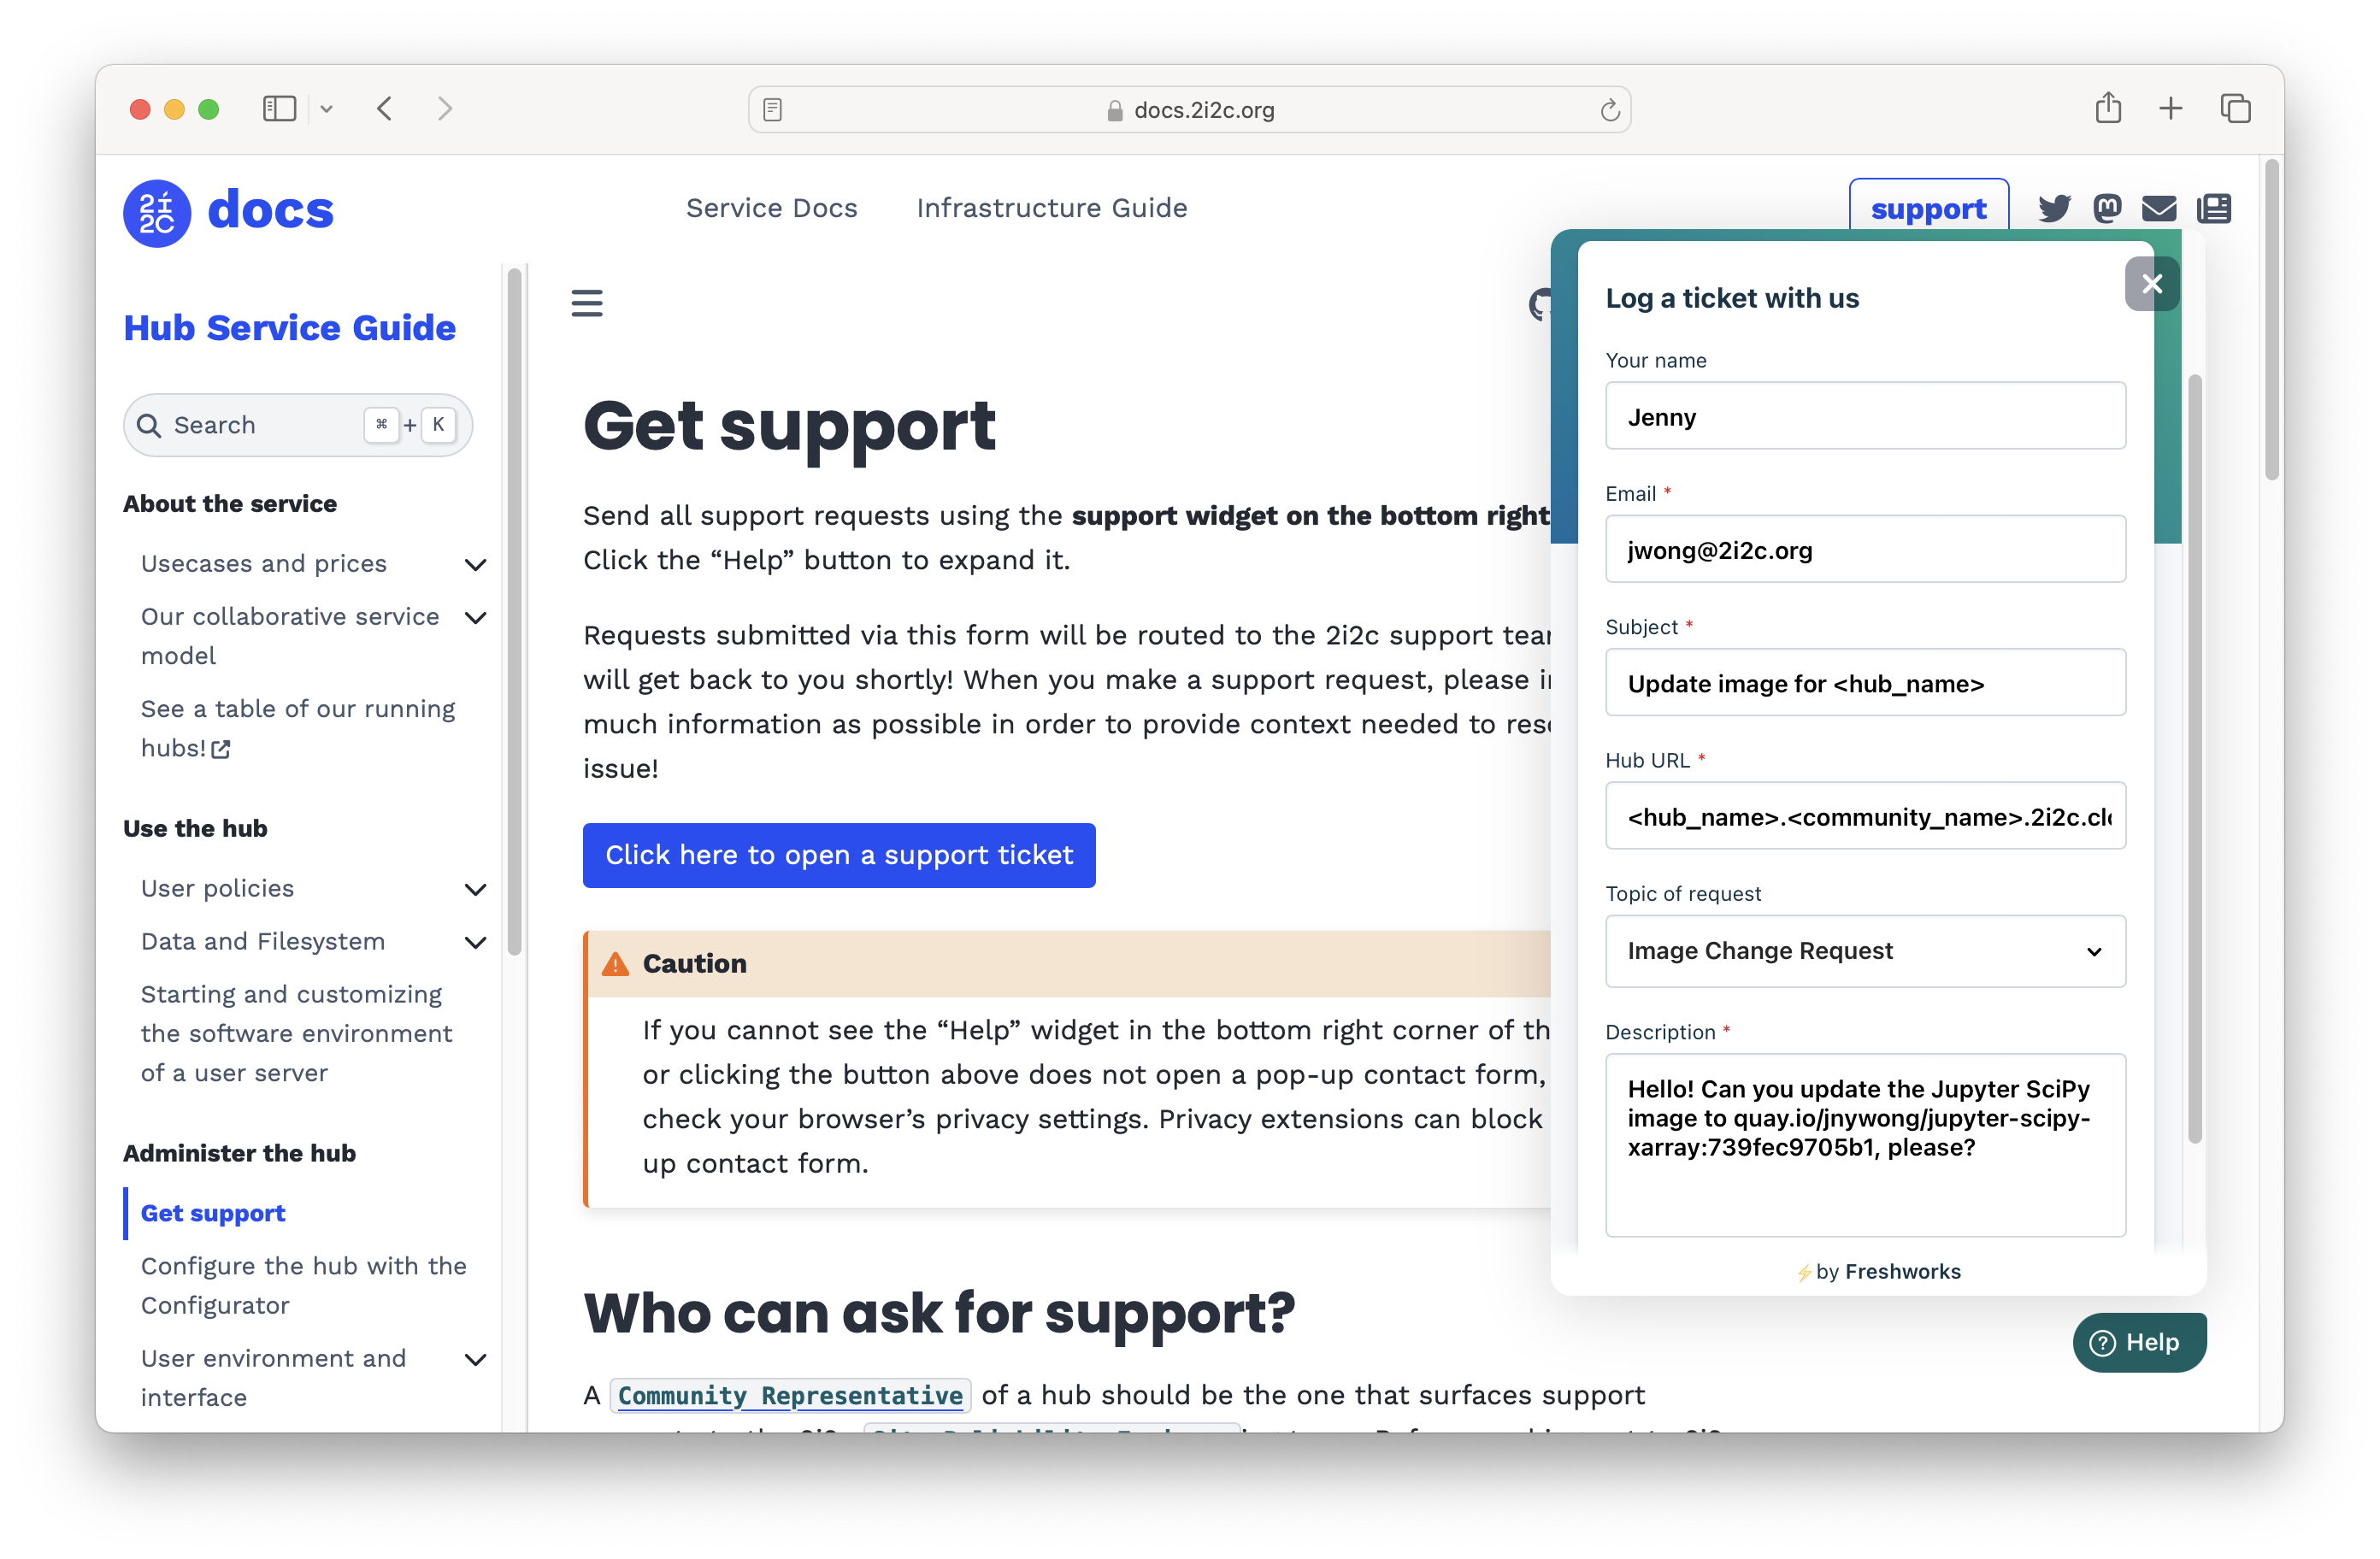
In the Topic of Request option, select the Image Change Request option and in the Description provide a link to the full image tag. Include the image and tag from above.
Click the Send button to confirm the support ticket request.
Create multiple environments for users to select#
If your hub’s community has workflows that differ significantly, it can be useful to create multiple user environments for your hub. This uses Jupyter Hub User Profiles to create a menu of environment options when a user launches a new session.
To add multiple environments for your hub, take these steps:
Follow the steps in Create your own image for each environment you wish to offer your hub’s users. You should have one repository per environment, and each one should push to a Docker image registry via the repo2docker action.
Open a support request requesting that your hub be set up to serve multiple user environments. A 2i2c engineer will assist you in configuring the hub to set up multiple environments.
Allow users to build their own environment image#
Hubs can be configured to allow users to dynamically build environment images from the JupyterHub. This provides a lightweight UI allowing users to point the hub to a GitHub repository containing the definition of the environment they wish to build.
Temporarily install packages in a session#
You can temporarily install packages in your environment that will just last the duration of your user session. They will get wiped out when your user server is stopped, to ensure that you always start from the ‘default’ environment.
The recommended way is to put %pip install <list-of-packages> or
%conda install <list-of-packages> in the first cell of any notebook
you distribute, so when run it’ll install necessary packages. For R,
you can use install.packages("package-name") as you normally would.
Warning
While tempting, do not use !pip install --user <packages> to install
packages. This makes the base environment different for different users,
causing hard-to debug-issues. This could also render your user server
unable to start, due to conflicting packages. See this blog post on using pip in Jupyter for some helpful explanation.